

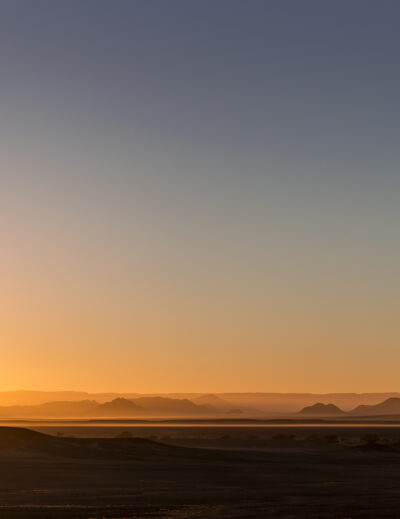
Safari in Namibia: photography equipment and lenses
There is a post here on the blog that is already three years old and is called “Photo Tips Part 1“. The “Part 1” implements that a sequel will follow and on no other topic do I get as many questions as about our photo equipment. Unfortunately, I never found the time to write a “Part 2” and in the meantime our photo equipment has changed so much that a lot of information in Part 1 is completely outdated anyway.
In mid-2017, we switched completely from Canon to Sony (before that, we had been on the road with Canon and Sony in parallel for a little over a year). Until mid-2018, we photographed exclusively with fixed focal lengths. And now – another year later – the fixed focal lengths are taking a break more often and the Sony FE 24-70 mm f/2.8 GM zoom lens has blossomed into our beloved “all-rounder”.
But what we lacked over all these years was a decent telephoto zoom lens. Occasionally, there were moments when I was annoyed that we didn’t have one with us (e.g. on the hike in Val Cluozza during the deer rut). When we planned the trip to Namibia and Botswana, it was clear: for a photo safari our equipment had to be supplemented with a proper telephoto zoom lens. Sony Switzerland kindly loaned us the telephoto zoom lens FE 100-400 mm f/4.5-5.6 GM OSS for testing purposes for the three weeks. Now all we had to do was hope for great animal encounters.
Our photo equipment for safari photos in Namibia
The following camera equipment was brought along on the trip:
- Sony a7Riii
- Sony a9
- Sony FE 100-400 mm f/4.5-5.6 GM OSS
- Sony FE 24-70mm f/2.8 GM
- Sigma 20mm F1,4 DG HSM | Art | Canon
During the safari, we used the Sony a9 with the Sony FE 100-400mm as the main camera, as it has better performance than the a7riii in terms of speed and may be better at capturing animals in motion.
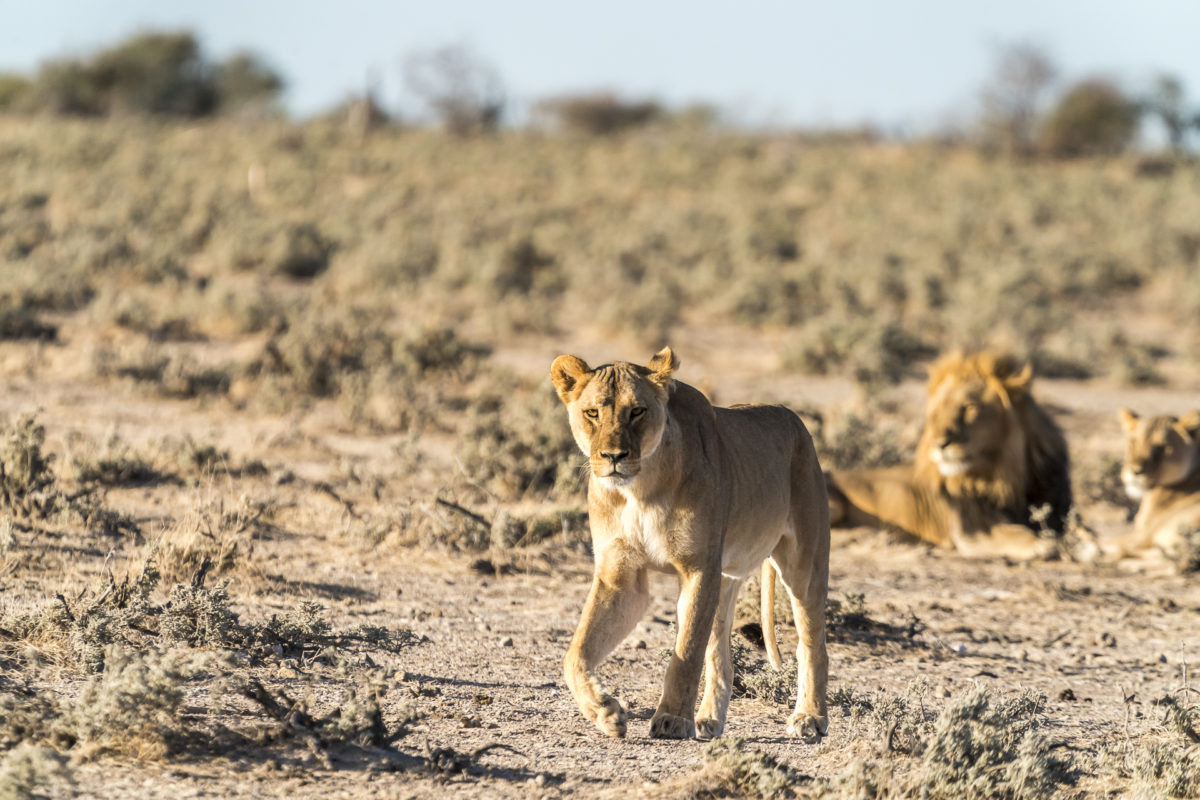
We also bought a 2x teleconverter with which you can double the focal length. With the FE 100-400mm you can achieve a maximum focal length of 800mm. Sony does not recommend using this converter in combination with the telephoto zoom lens (loss of quality). However, the photos we took with it didn’t turn out too badly (two of the lion pictures in this post were taken with it).
5 Tips for a Successful Photo Safari
Making the Right Lens Choice
Of course, the choice of lens depends on what kind of camera you are using. Our two Sony cameras are full-frame mirrorless cameras and this is where things get really interesting from a focal length of 300mm. In contrast to a fixed focal length, the advantage of a zoom lens is that you have a certain flexibility and can react quickly to changing situations (e.g. if an animal approaches the safari vehicle and you are suddenly much too “close” with 400mm).
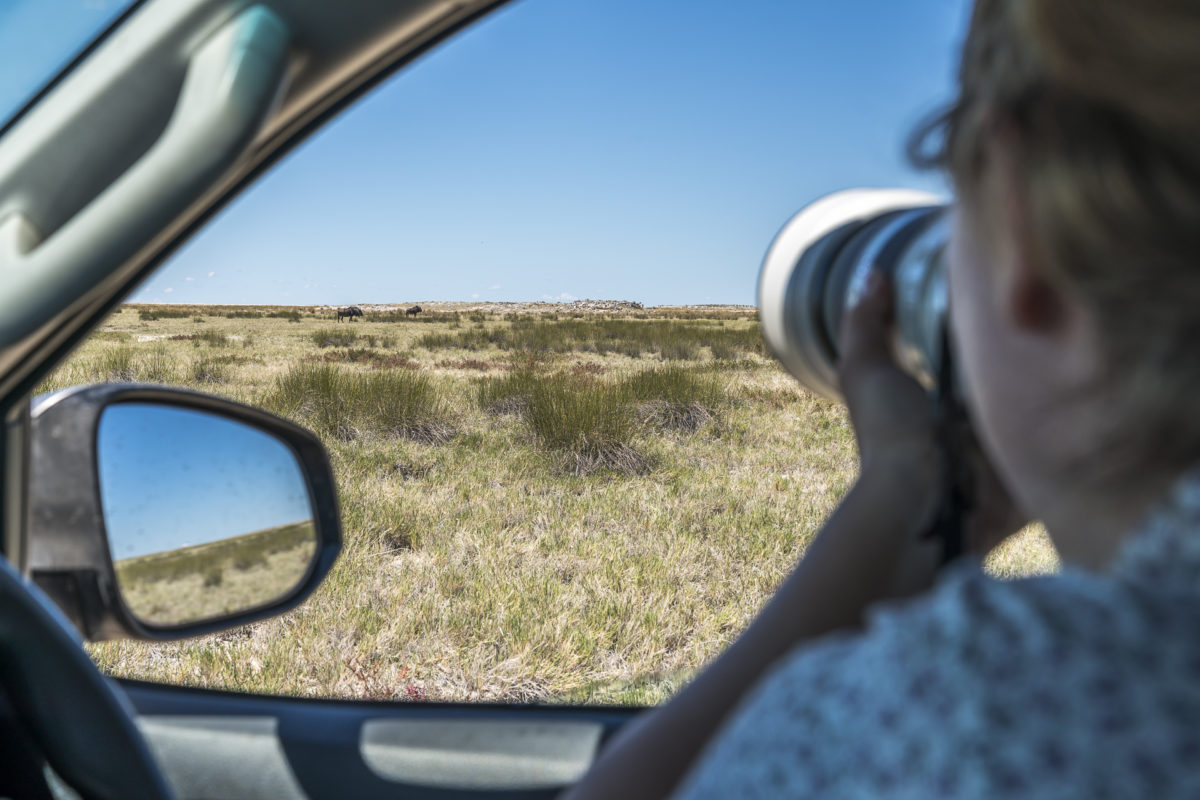
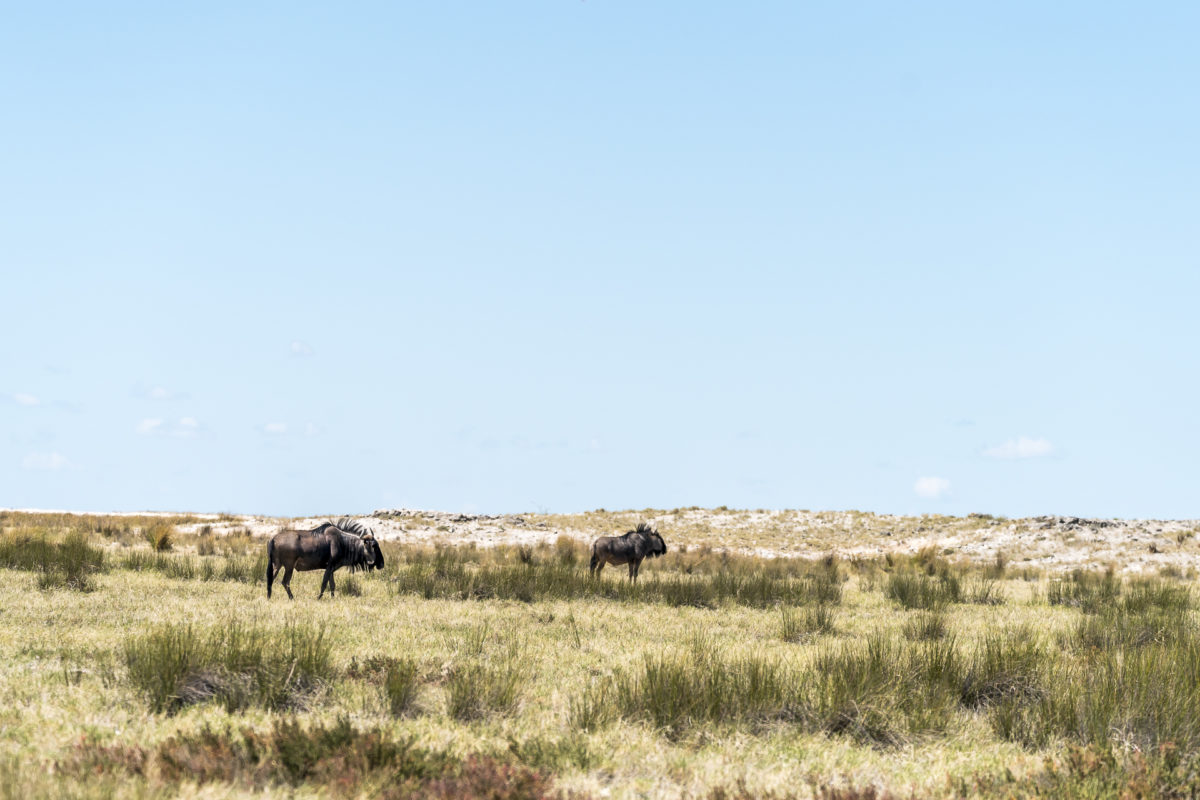
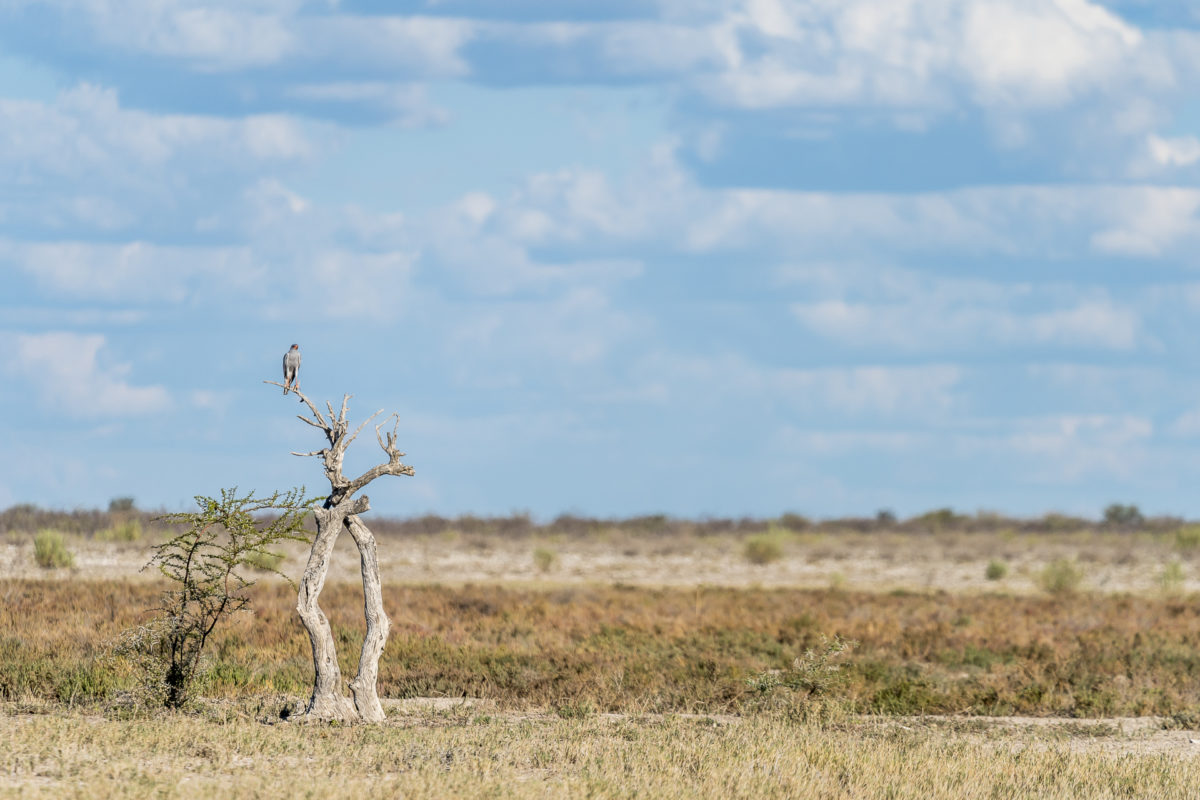
The example below shows which images are taken from a distance of about 50m with a 400mm zoom.
When using the teleconverter, it is recommended to place the camera in a stable position. During our self-drive safari in the Etosha National Park, we used the car window as a support surface
Savor the morning and evening hours
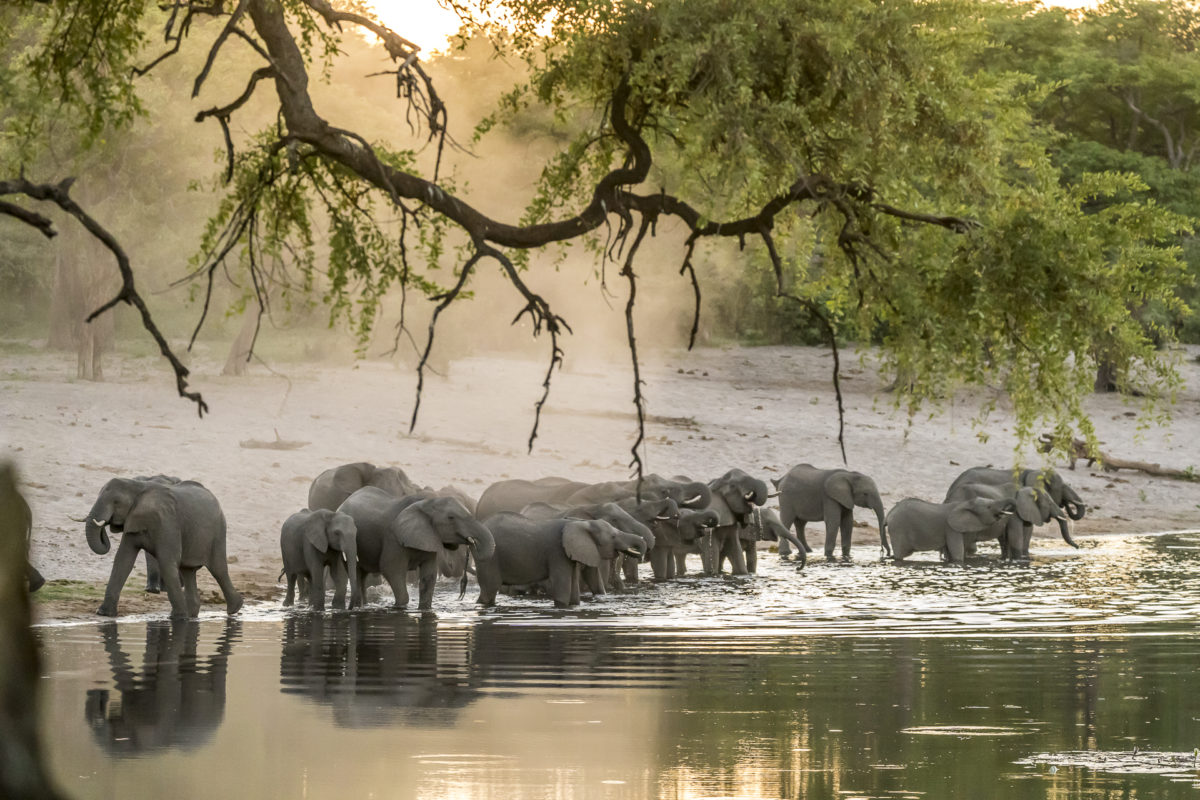
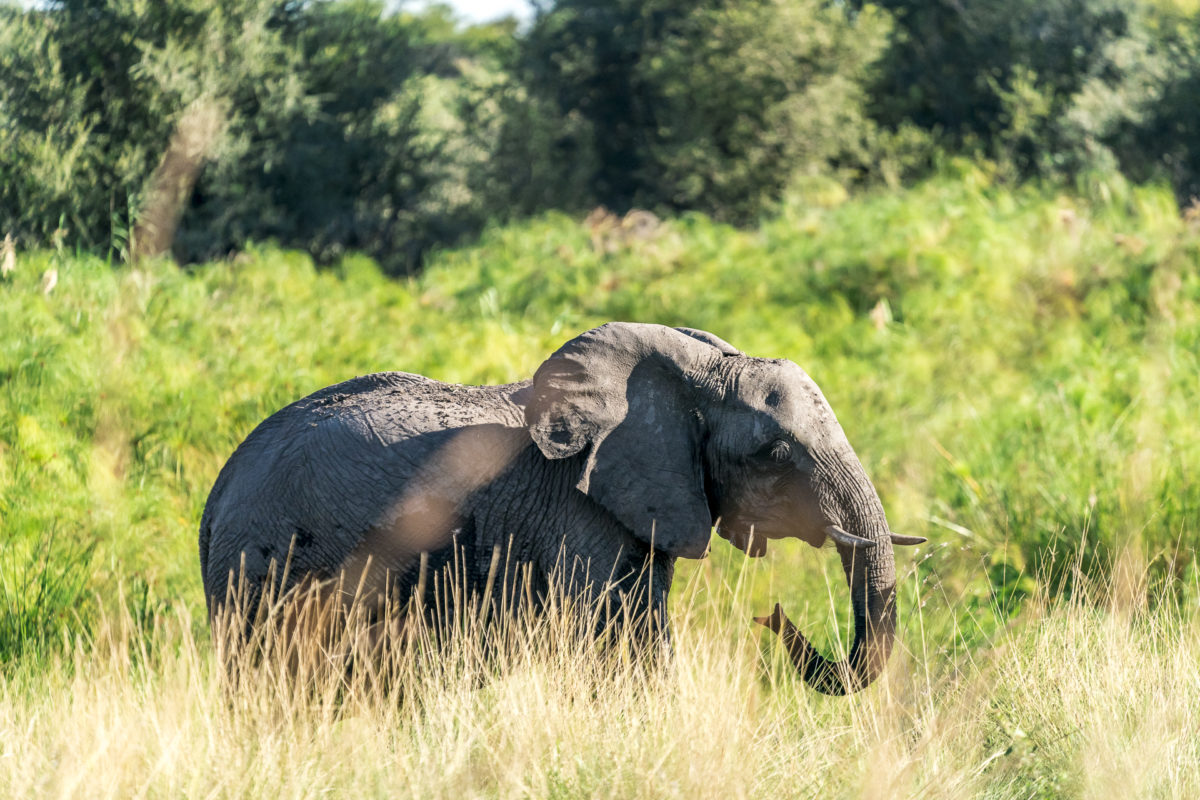
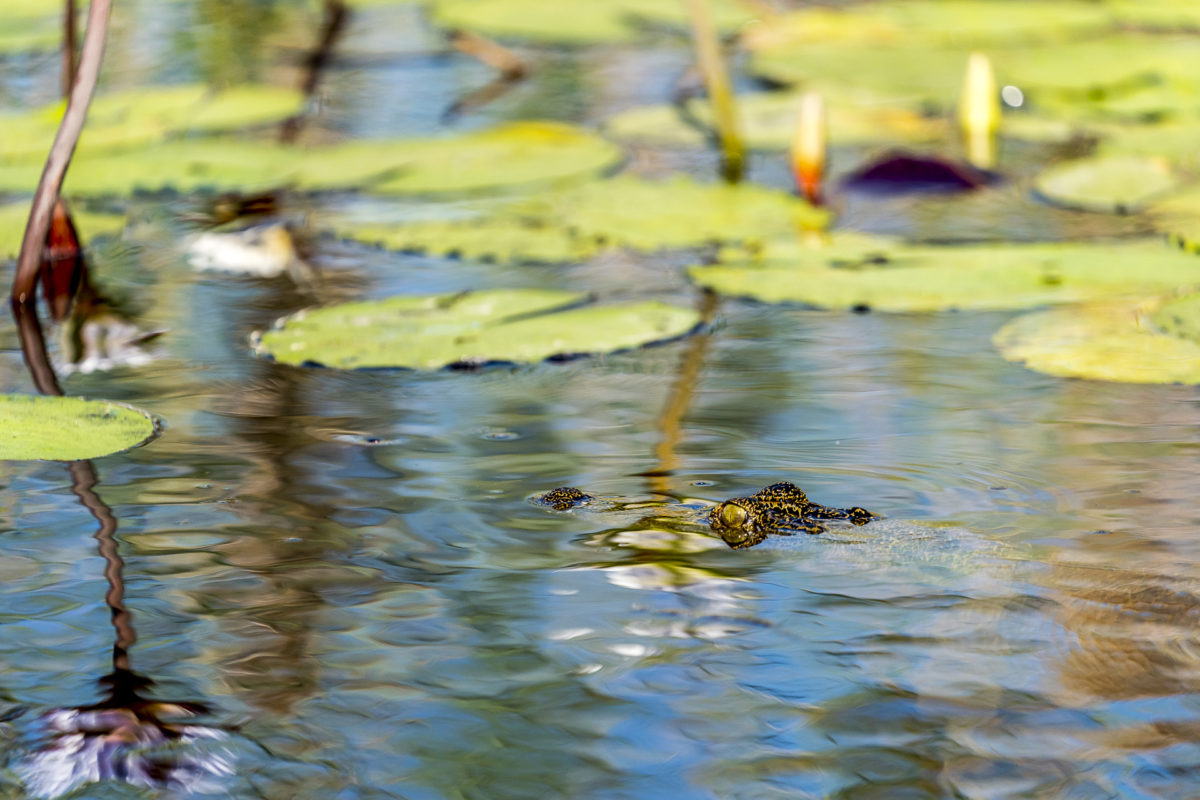
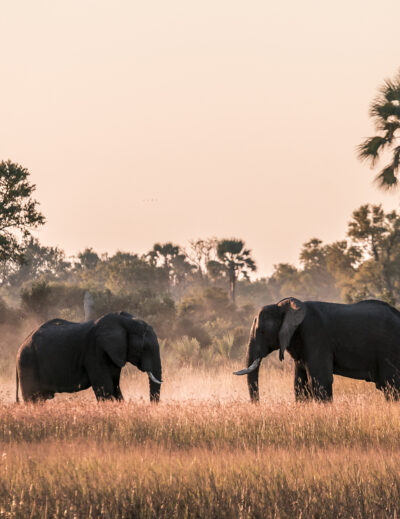
In addition to the subject, the key to atmospheric images is the light. And it’s definitely worth enjoying the early morning hours and later afternoon hours to the fullest. In Etosha National Park, the gates only open at sunrise and close at sunset – the window of opportunity with optimal light is therefore relatively short. In Bwabwata National Park we were a bit more flexible in this regard and only returned to the lodge after dark. That’s how this atmospheric elephant picture came about.
Be patient
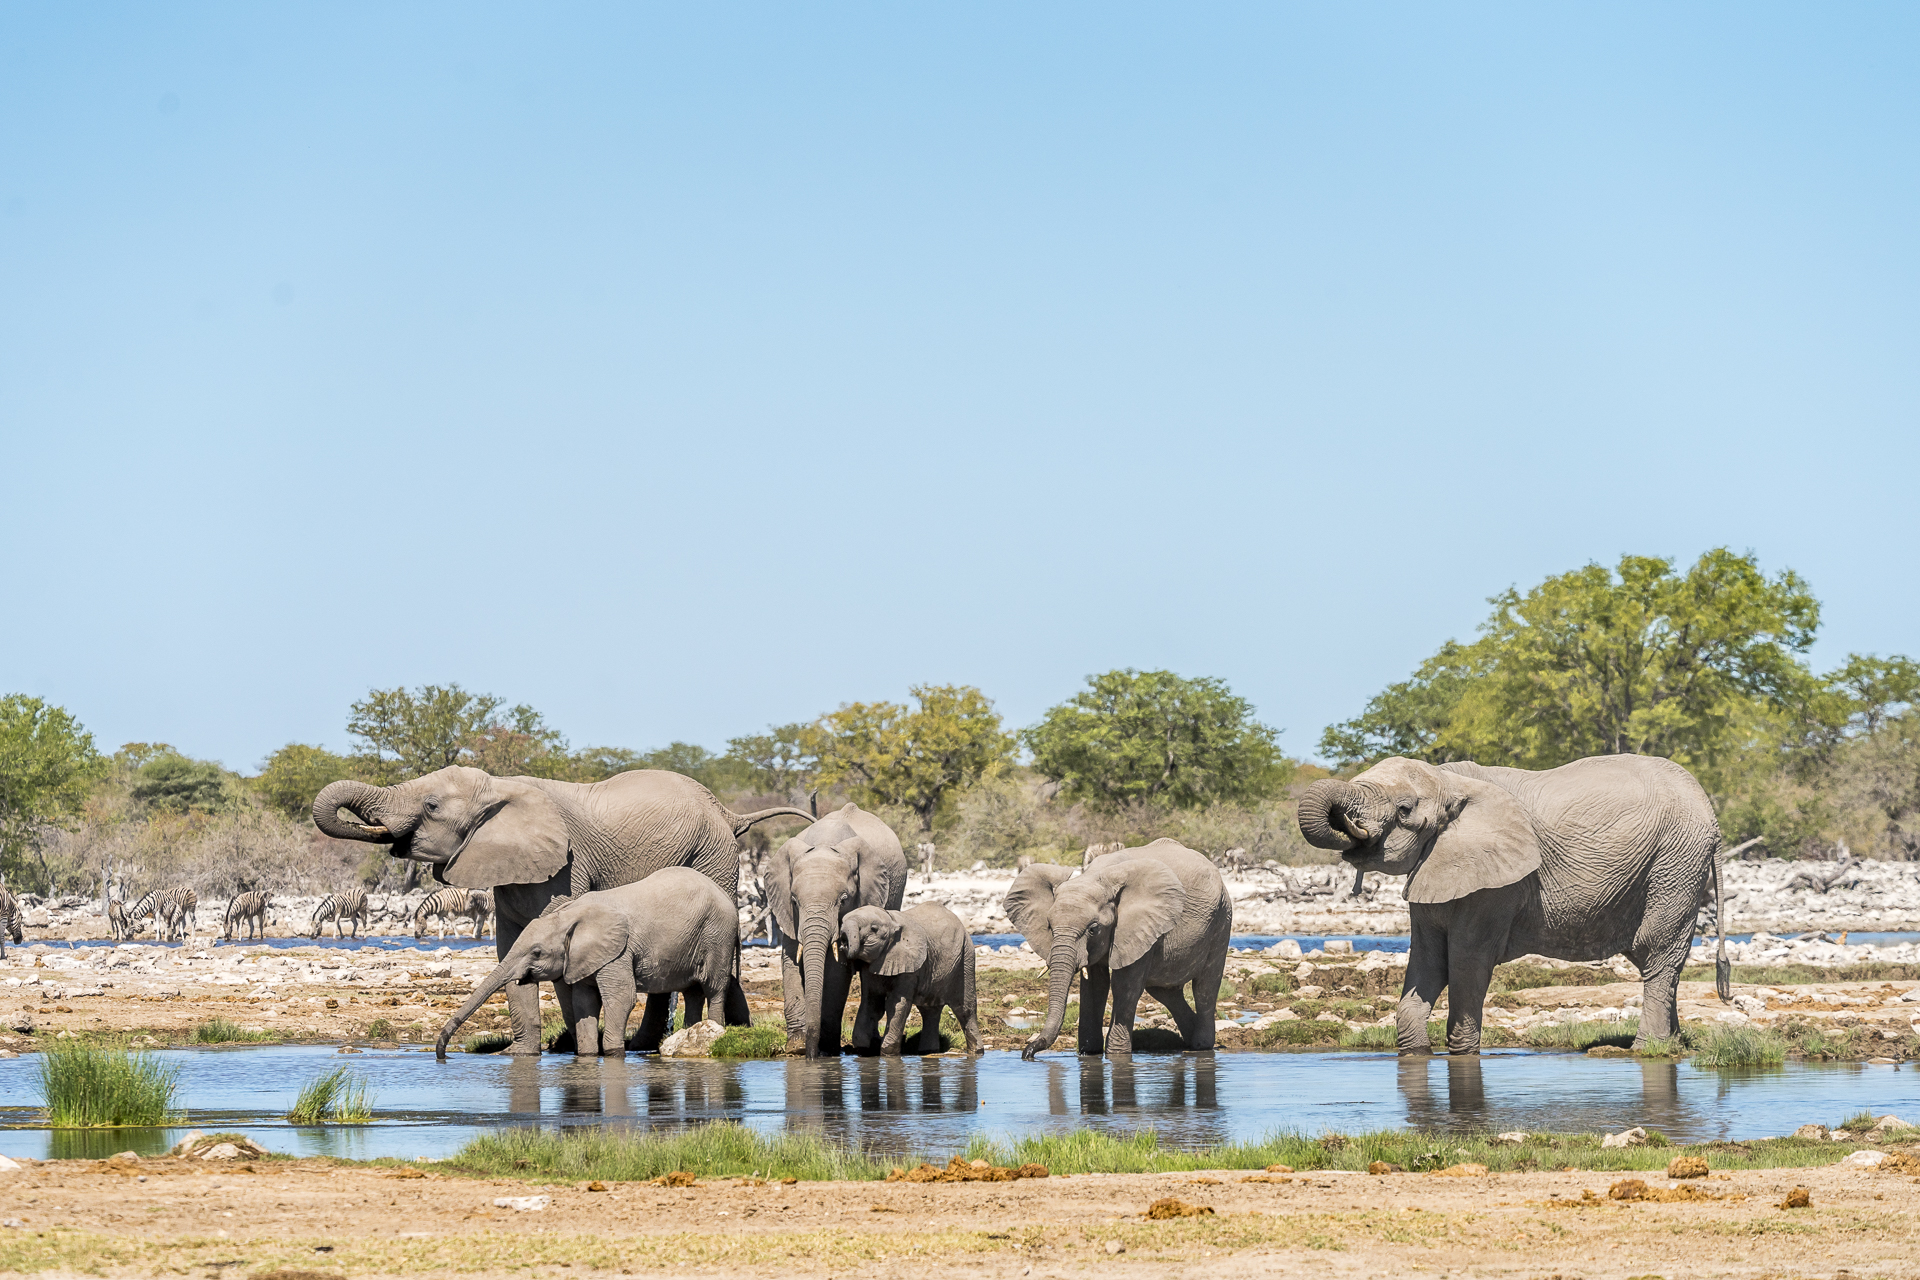
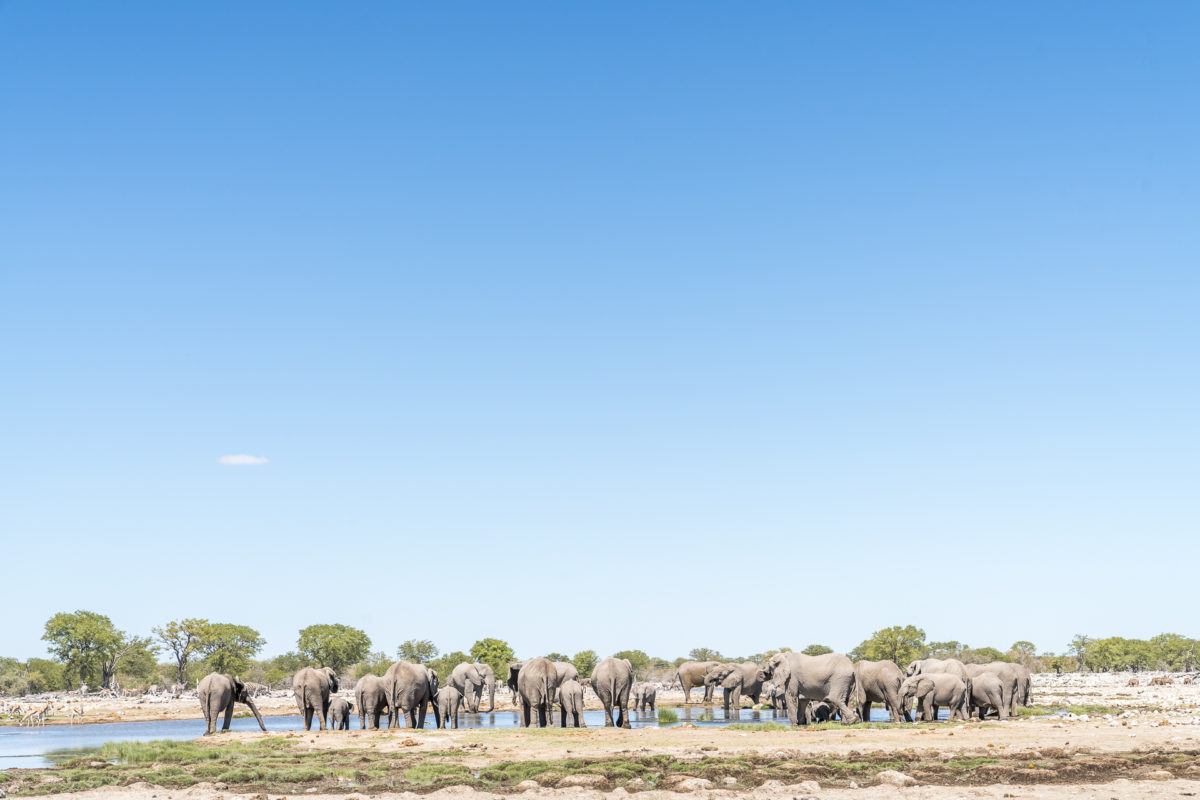
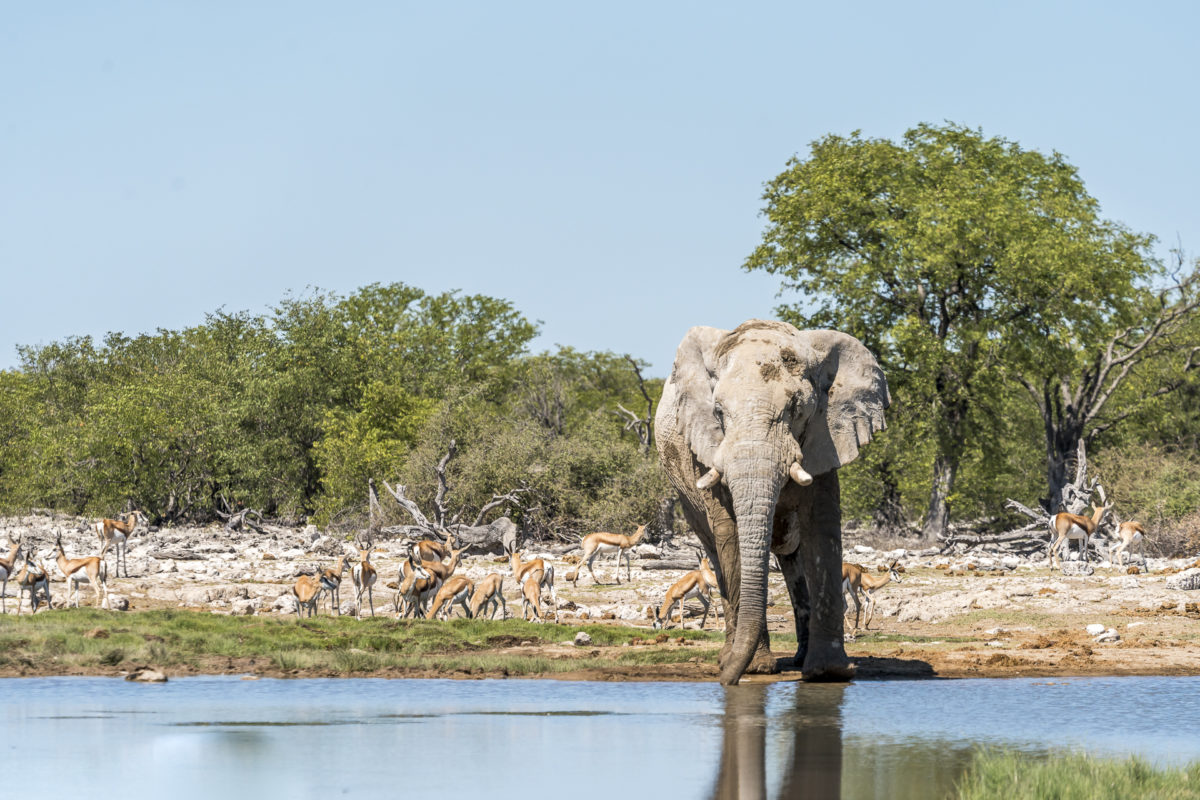
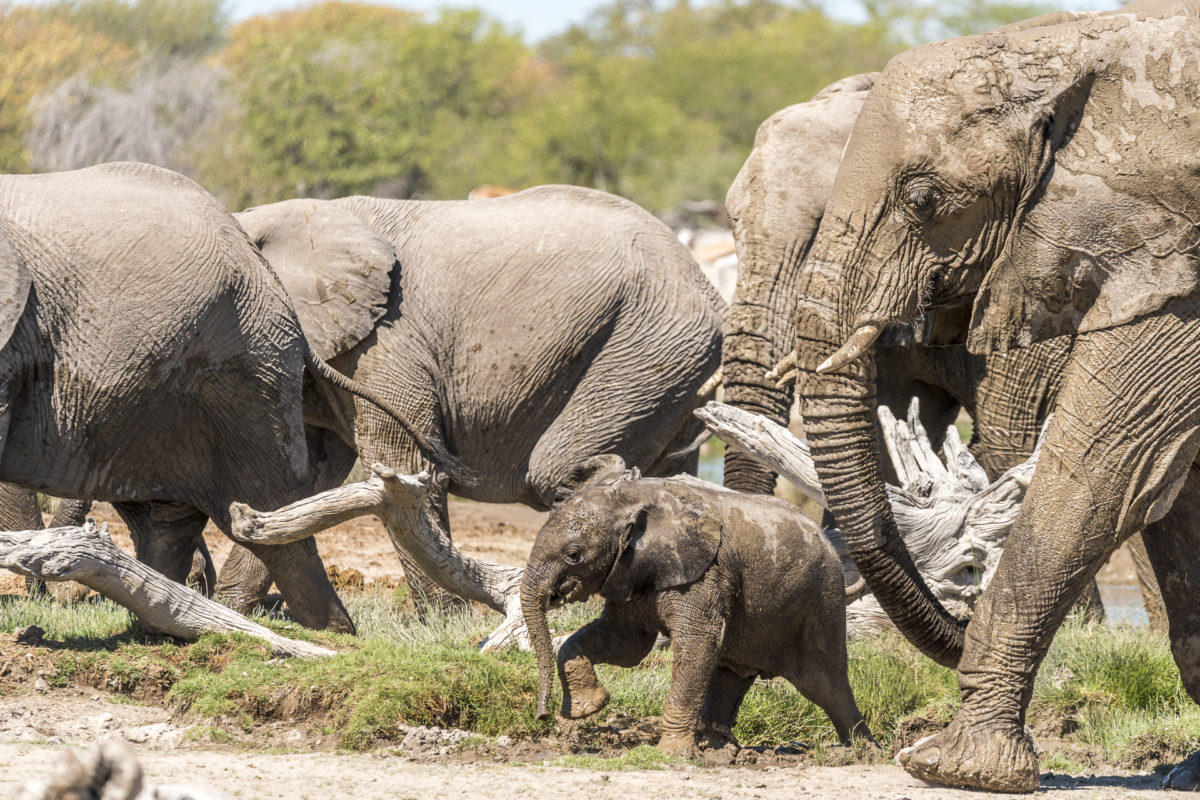
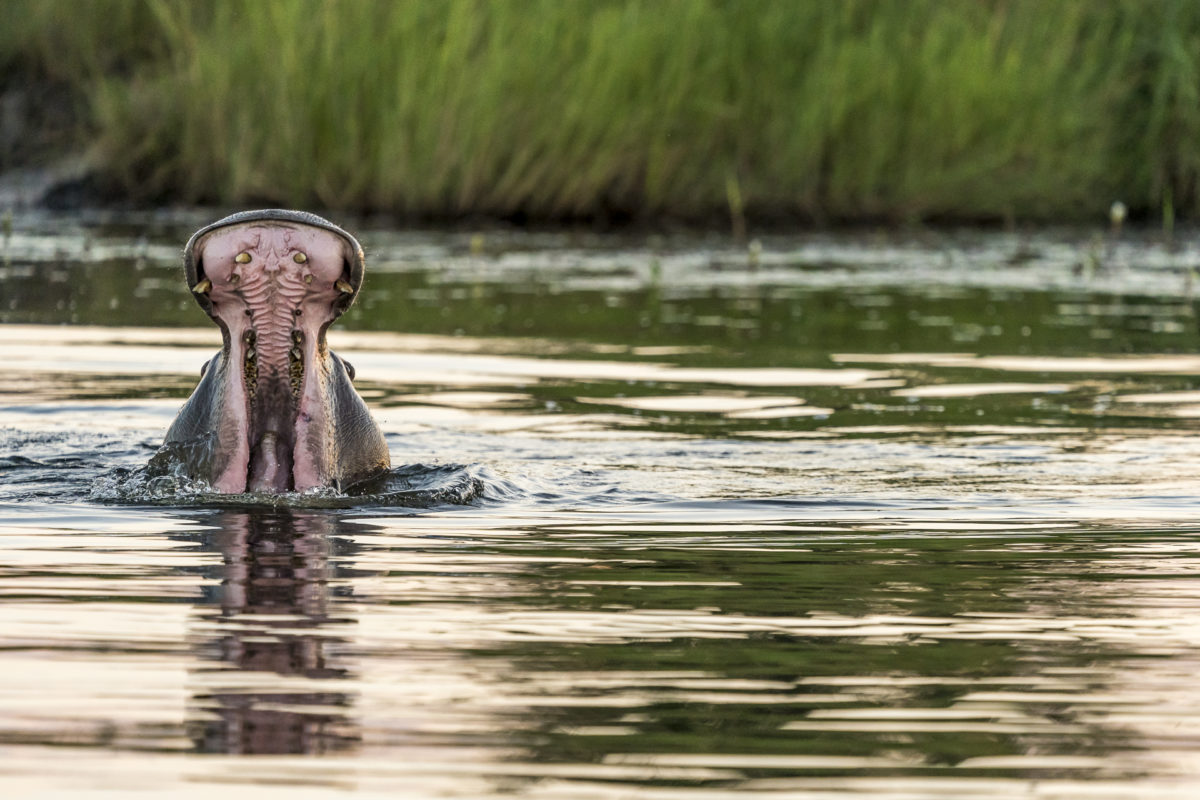
Especially at waterholes, it is worthwhile to linger for a longer time and observe what is happening around you. We stopped several times at waterholes, where at first glance there seemed to be “nothing” going on and then suddenly huge herds of elephants emerged from the thicket and provided action.
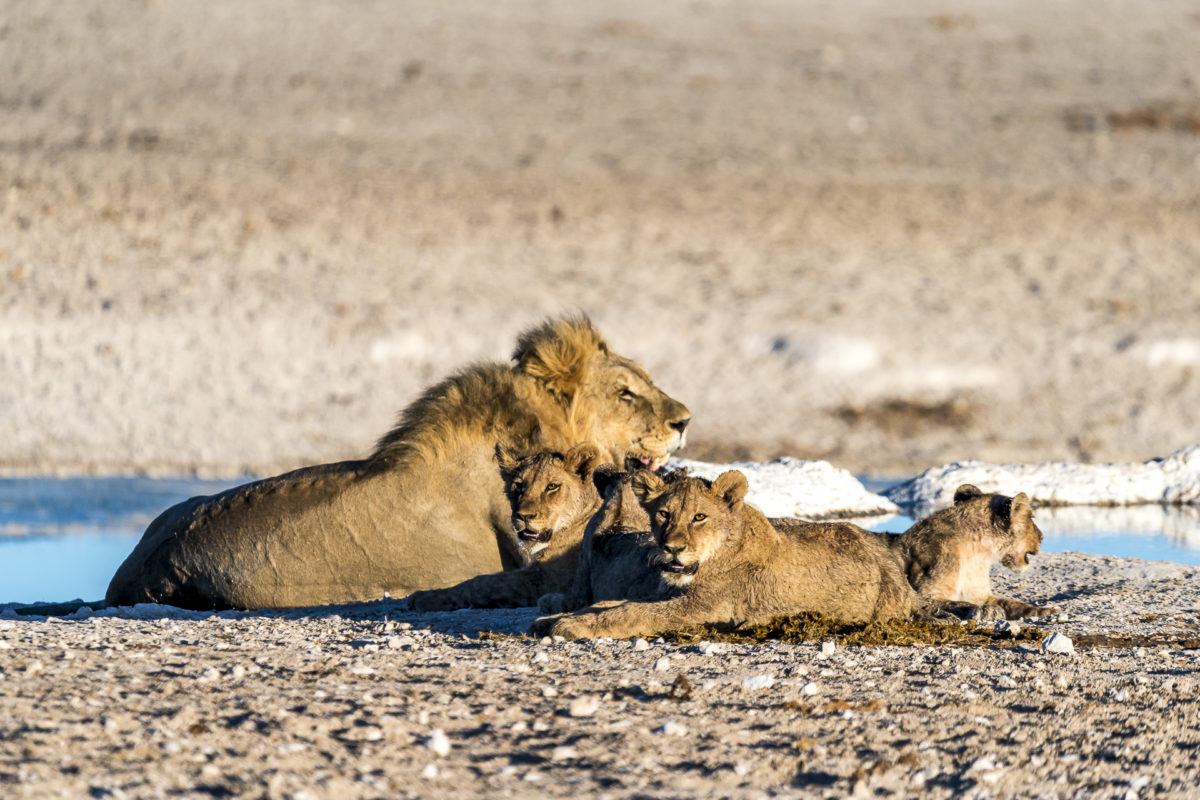
Keep your camera close at hand
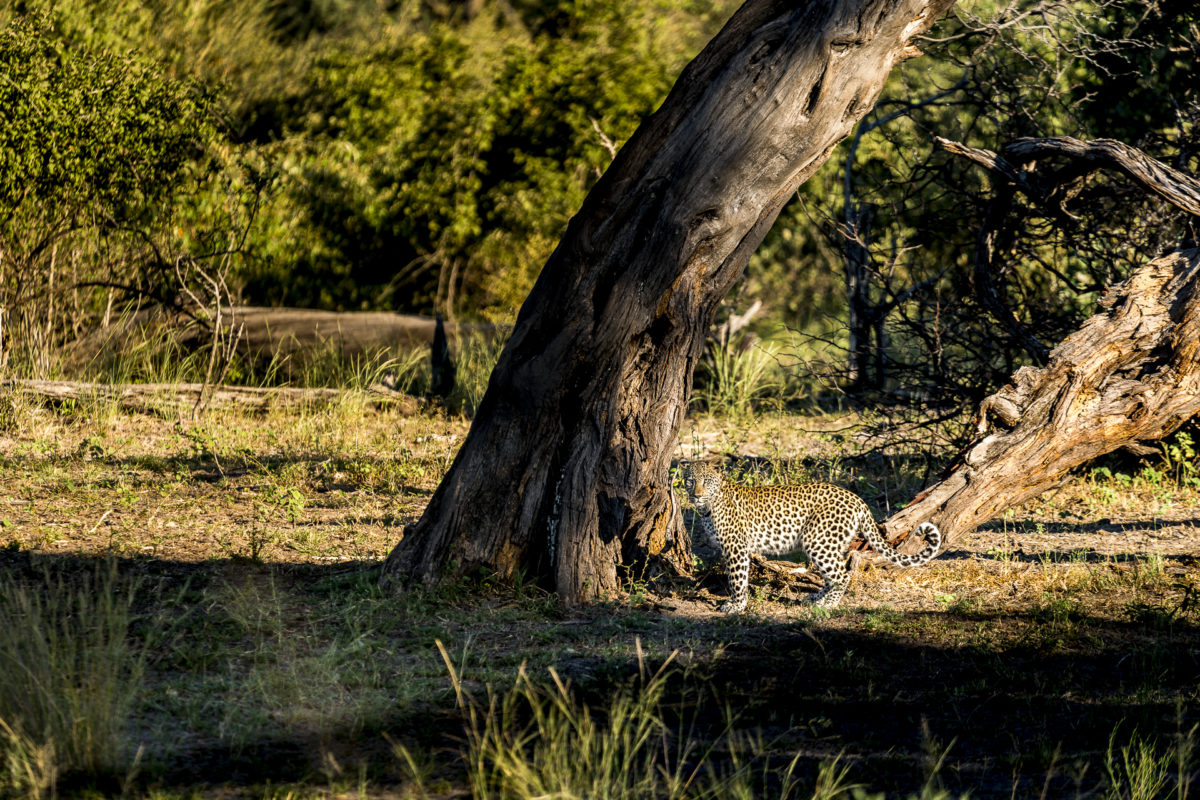
The highlight of every safari: the “cats”. Everyone secretly wishes to see lions, leopards and cheetahs. And the following applies – most of the time you don’t have the camera at hand at the exact moment when the time comes. We almost had the same experience when we encountered a leopard. This morning we were not on a game drive, but on the way out of the Bwabwata National Park towards Botswana. The camera was stowed away in the photo backpack and we chatted relaxed with our guide. Suddenly, something scurried through to the left. Our guide abruptly stopped the car and I was like this: A leopard! The friend was nimble enough to open the camera backpack, take out the camera and pull the trigger at the exact moment when the leopard resignedly realized that his prey was gone. All this happened within a few seconds and I am still amazed at what kind of picture we managed to take despite the camera being well stowed away at the beginning.
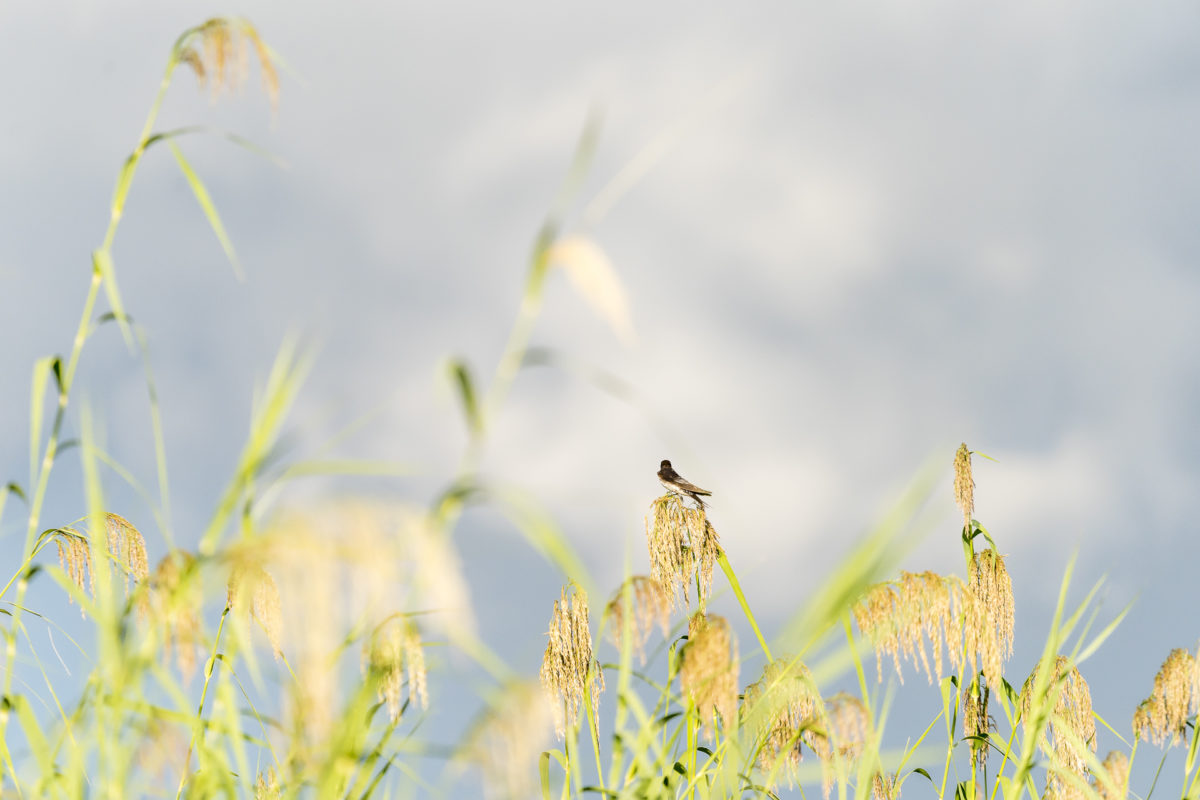
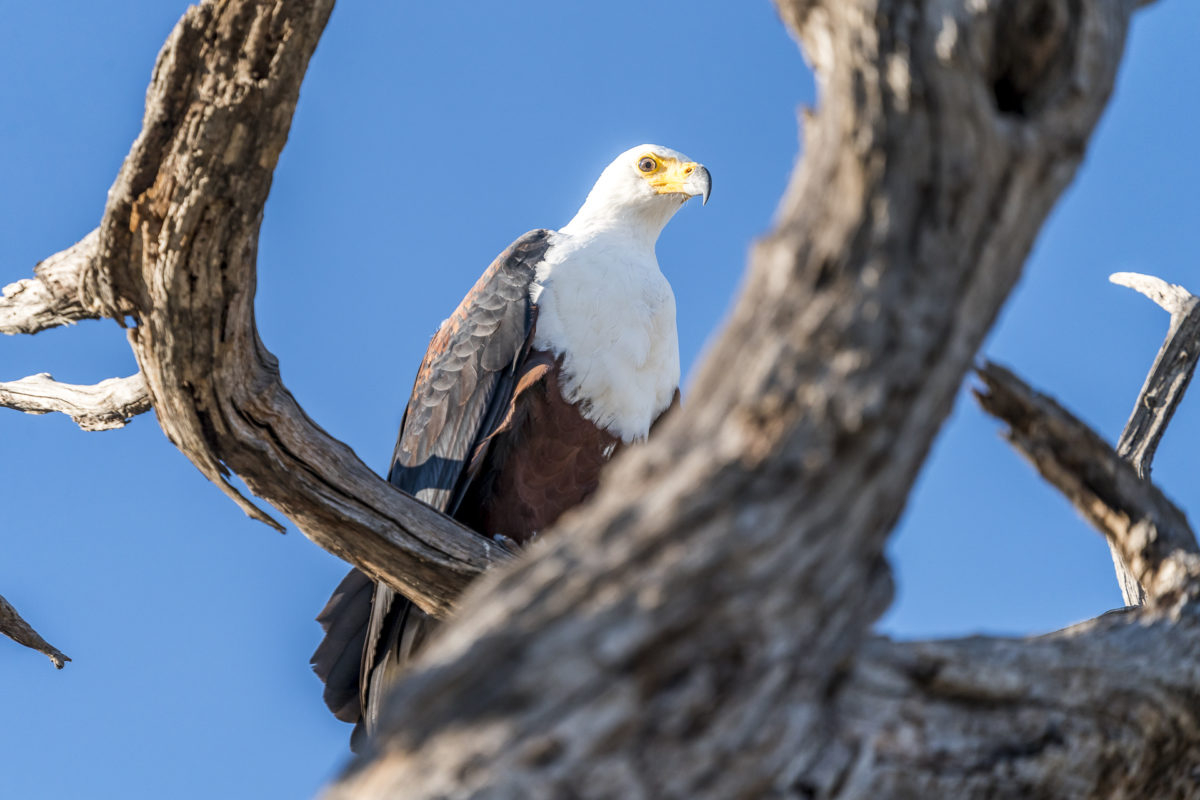
Don’t just focus on the big picture
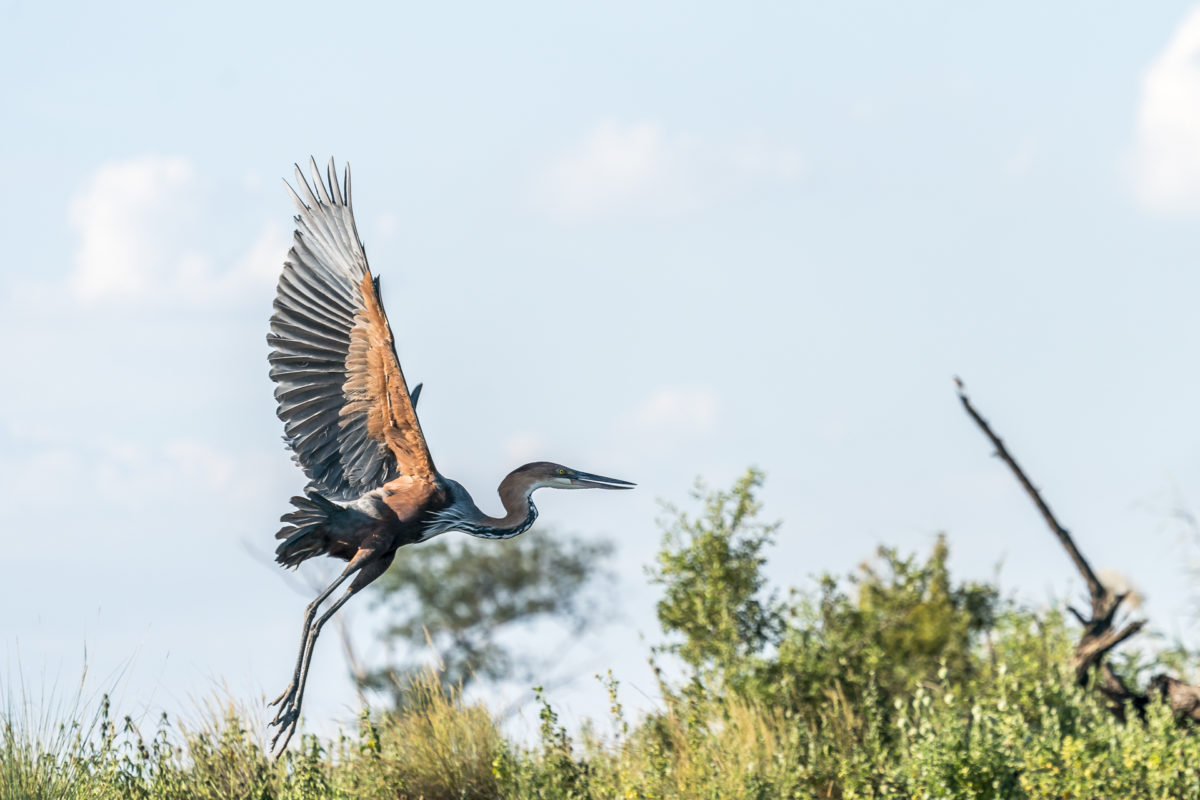
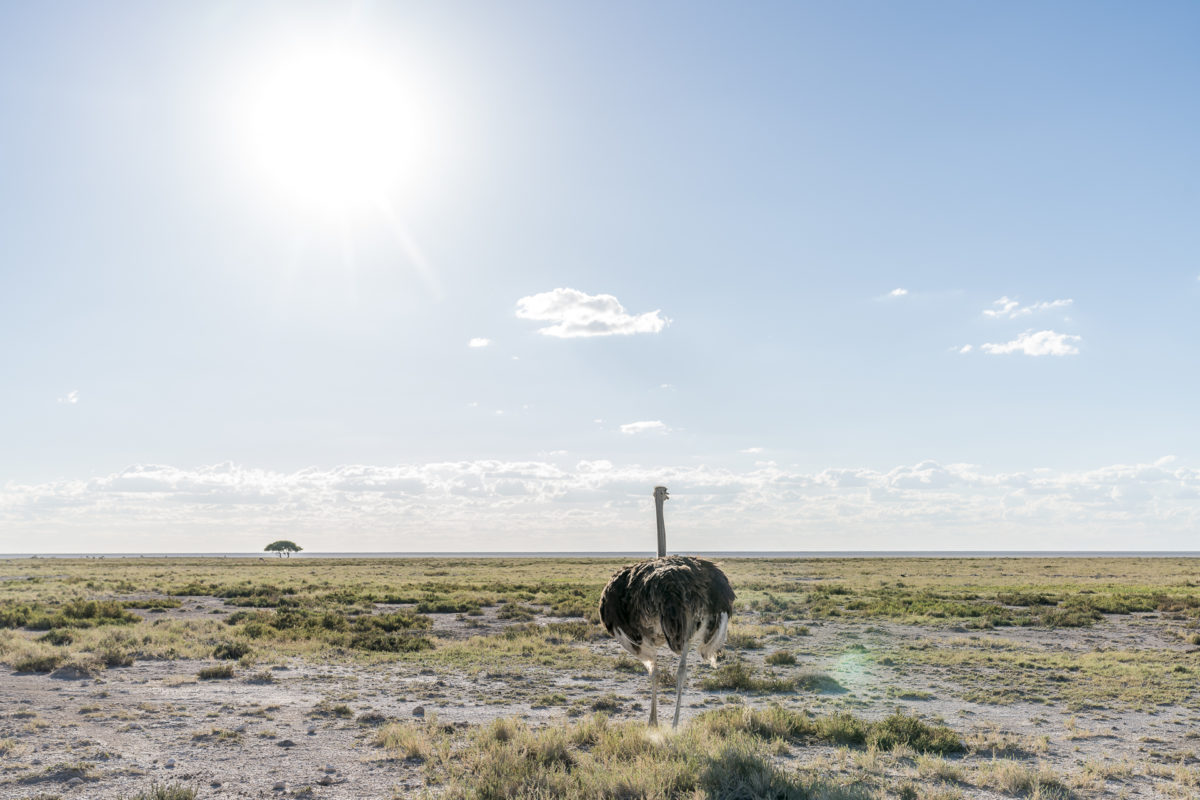
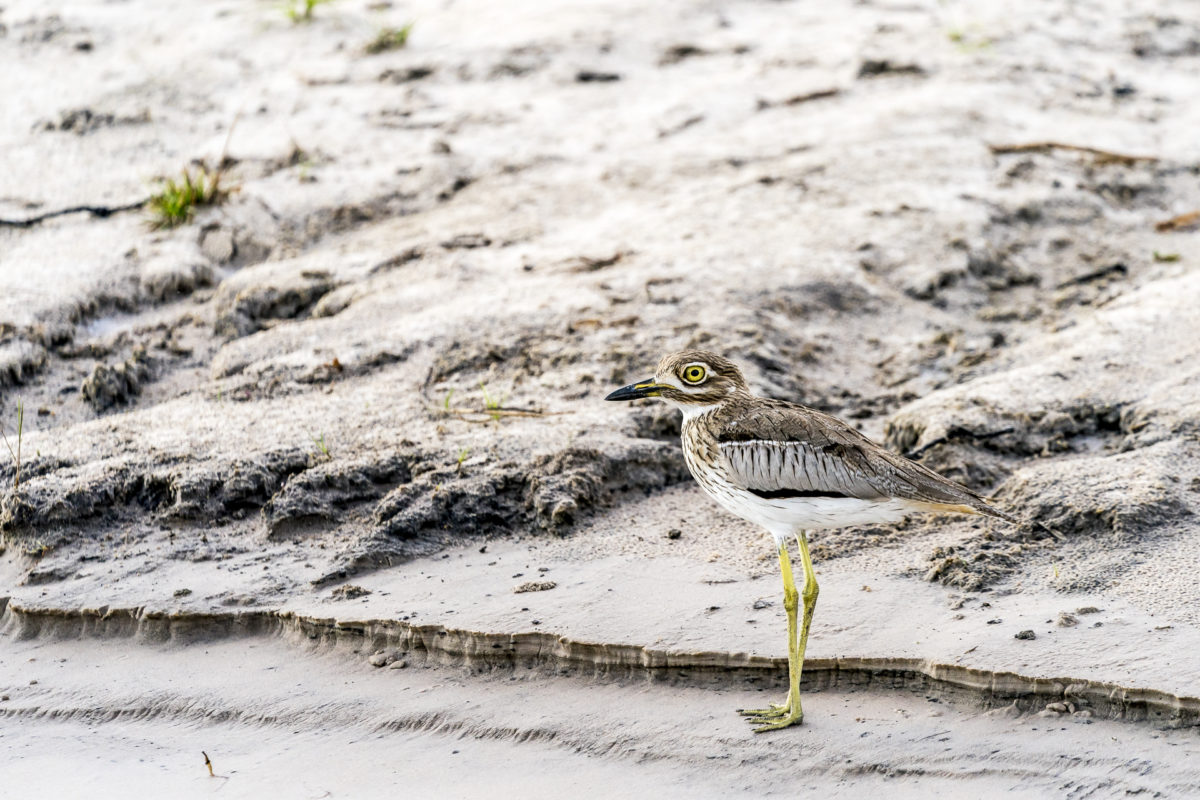
On a safari you can not only take great pictures of mammals – the bird life of Africa is also incredibly fascinating. It is therefore worthwhile to keep an eye out for exciting motifs in the treetops as well.
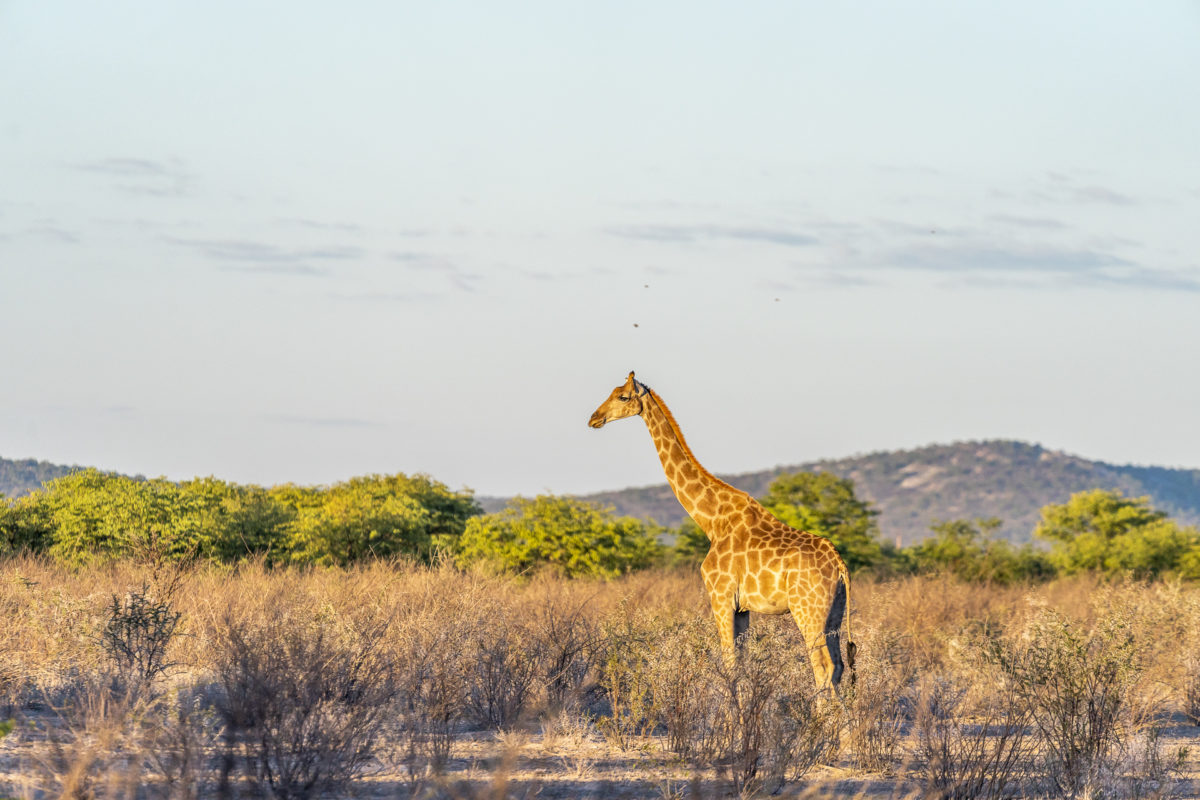
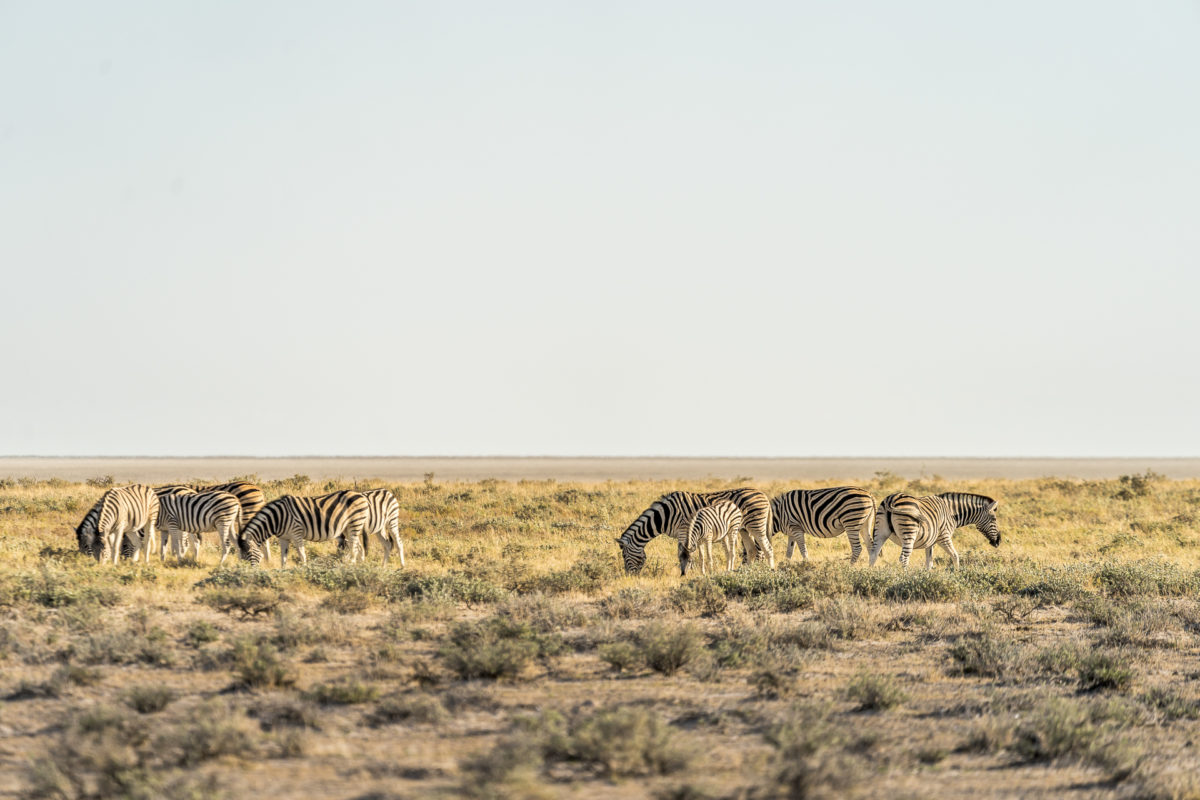
Safari in Etosha National Park
The Etosha National Park is one of the top destinations on a trip to Namibia and should not be missed on a beginner’s route. We took three days and were self-driven. At best, it may be worthwhile to take part in a guided evening game drive or morning game drive on the first day. With a time budget of three days, you can also easily get a map in one of the camps, where the waterholes and animal sightings are marked, and then go “stalking” yourself without haste.
Conclusion: The Etosha National Park is perfect for safari beginners and the sense of achievement of exciting animal sightings is guaranteed here.
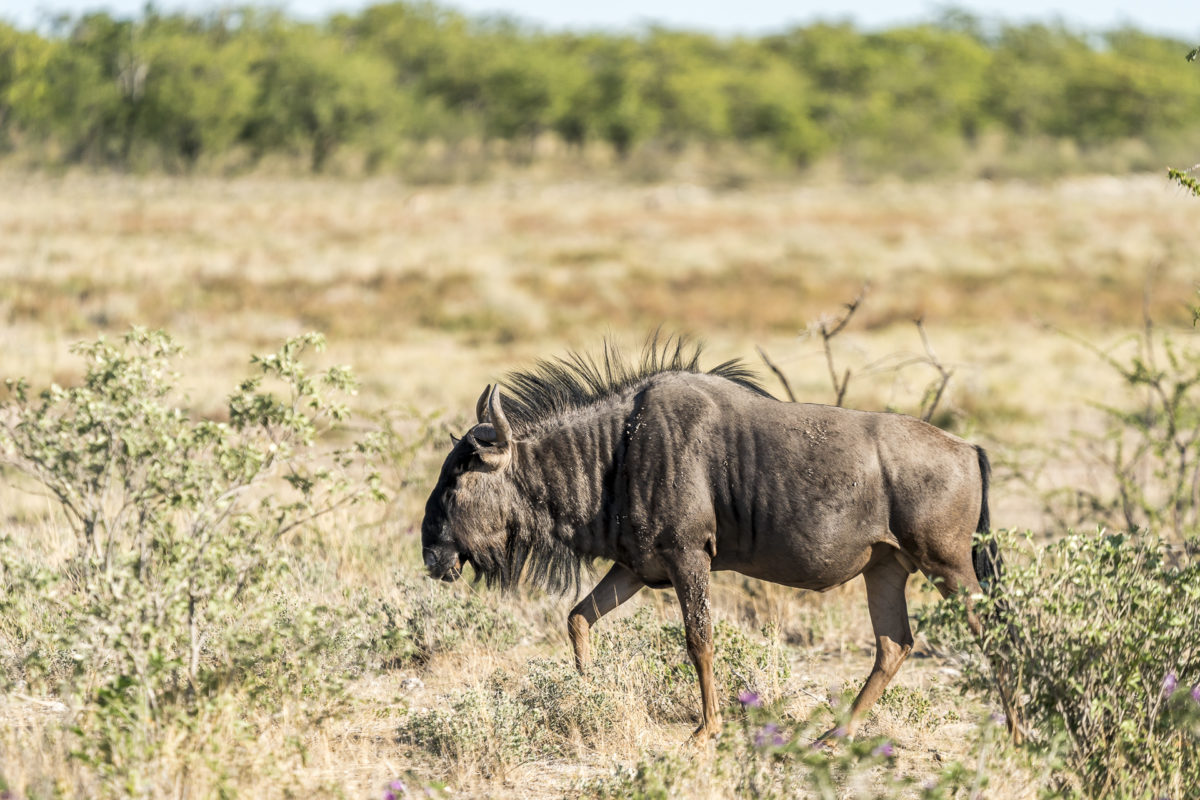
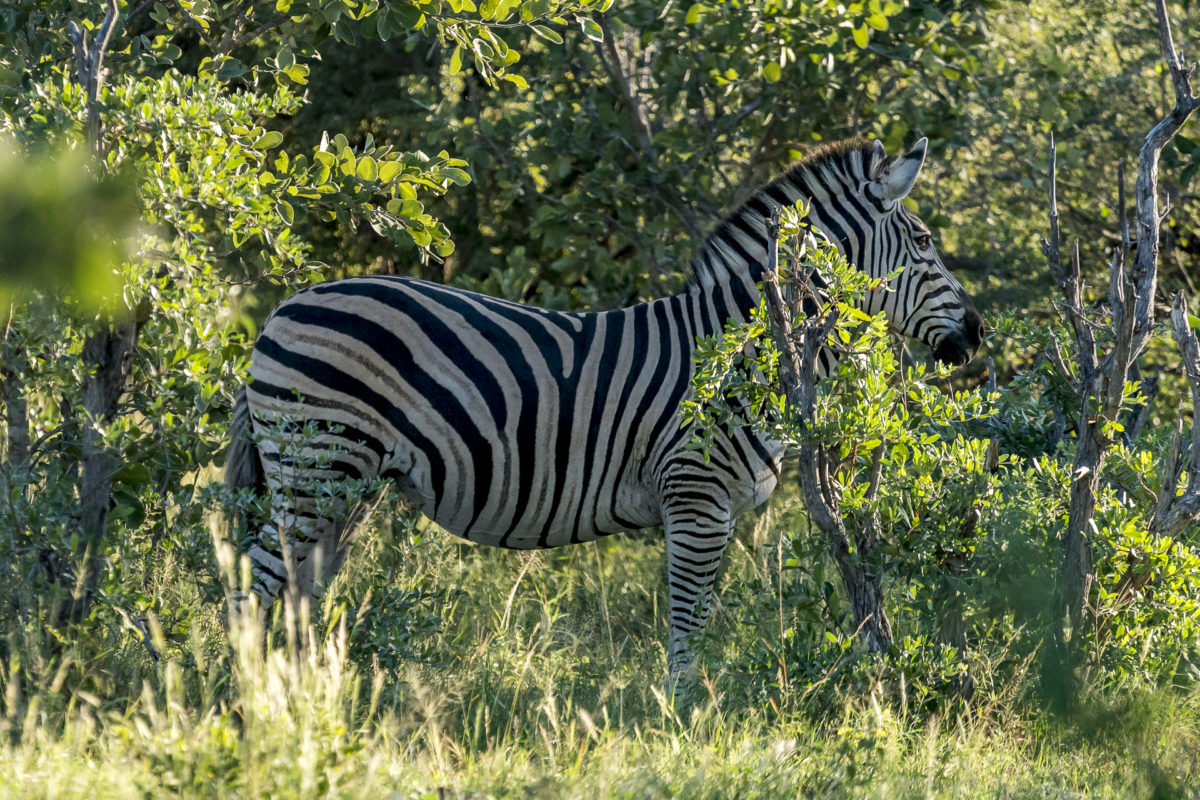
sony a9 400mm 1/1600 f5.6 ISO 640
sony a9 394mm 1/1000 f5.6 iso 160

sony a9 800mm 1/1000 f11 iso 1250
sony a9 800mm 1/1000 f11 iso 1250
Sony a9 400mm 1/1600 f 5.6 ISO 320
sony a7riii 38mm 1/320 f5.6 iso 100
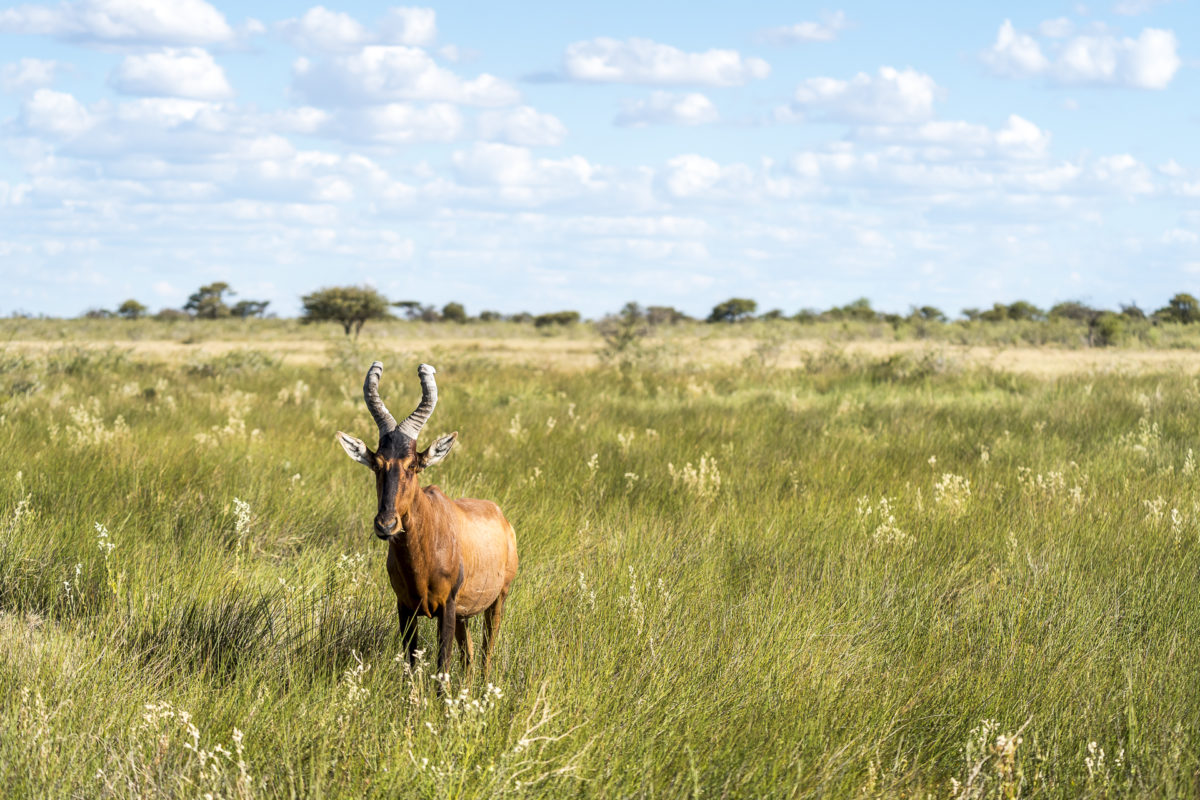
Sony a9 400 mm 1/3200 f 5.6 / ISO 400
Sony a9 400 mm 1/1600 f 5.6 / ISO 320
sony a9 400mm 1/2000 f5.6 iso 200
Sony a9 309 mm 1/2000 f8 ISO 400
sony a9 400mm 1/2500 f8 ISO 800
sony a9 400mm 1/2000 f8 ISO 800
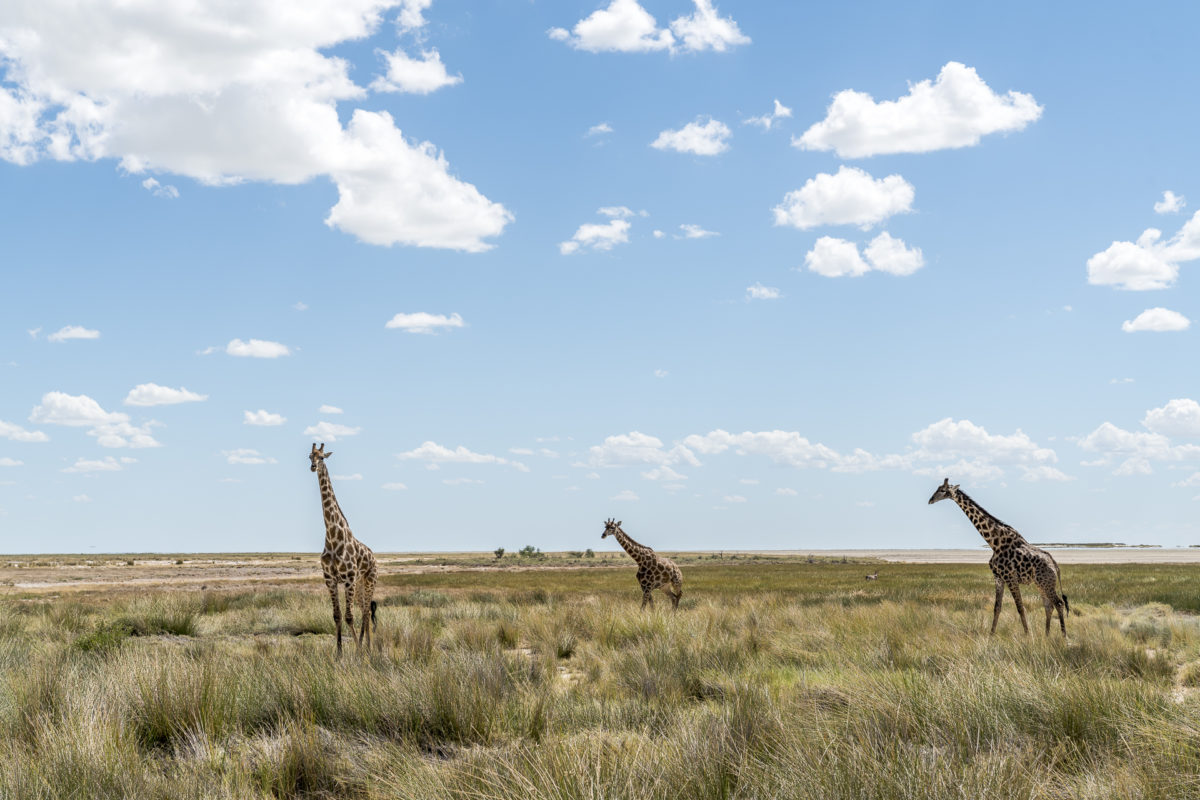
Sony a9 376 mm 1/1000 f5.6 ISO 250
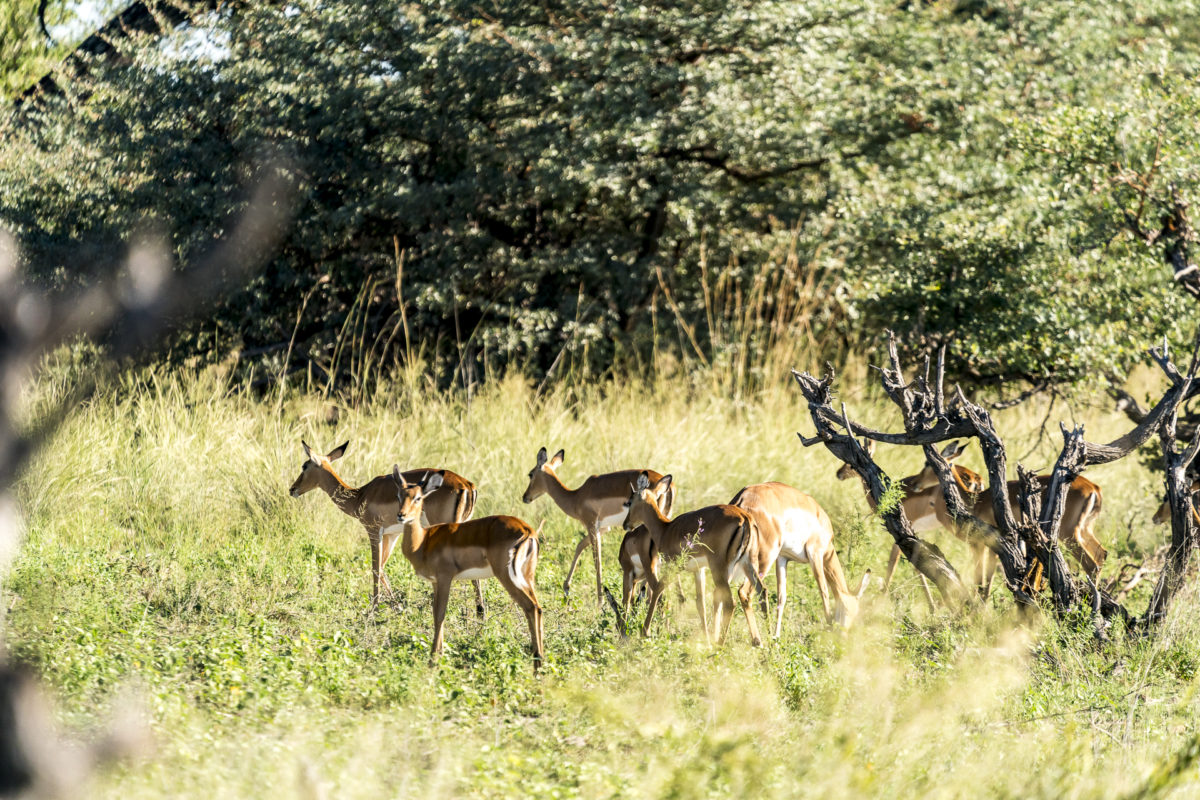
sony a9 100mm 1/2000 f5, iso 200
sony a7riii 62mm 1/320 f8 ISO 100
Practical tips for the Etosha National Park
- Best time to visit: The dry season between May and October is considered the best time to visit. This season, the grass is short and the animals congregate around the few waterholes – so it’s easier to spot animals. We were traveling at the end of the rainy season in April. Since this year’s rainy season was extremely dry, many animals were already in the vicinity of the large waterholes. The rainy season also has advantages for photography – the landscape is more lush and greener. In addition, prices are cheaper in the transitional period between the rainy and dry seasons (March/April) than during the high season.
- Opening hours: The Etosha National Park is accessible through four gates. The opening hours change weekly and depend on sunrise and sunset. Basically, you can only enter at sunrise and have to be outside again at sunset (or inside in one of the camps).
- Cost: Admission to Etosha National Park costs 80 NAD (around 5.60 CHF) per day for adults. For a vehicle with less than 10 seats, an additional NAD 10 per day will be charged. Contrary to the information on the website of the Etosha National Park, we did not have to pay the fee at the gate, but at the first camp. And although we didn’t stay in the park, we were able to get a permit for 2 days (this saves you from queuing the next morning at sunrise).
- Accommodations: There are three larger camps in the national park (Okaukuejo, Halali and Namutoni) and three smaller, more exclusive camps. If you are traveling without a roof tent and want to spend the night in the park, you should make reservations early. The advantage of spending the night in the park is that you save travel time. For an ideal itinerary, I would recommend a night in the Anderson Gates area, a night at Halali and a night at Lindequist Gate. With two nights at Etosha Village just outside the Anderson Gate and one night at Mushara Outpost, our route wasn’t ideal, but it wasn’t bad either.
- Motoring: Most of the routes in the Etosha National Park are well-maintained gravel roads. Only the roads from Anderson Gate to Okaukuejo Camp and the road from Lindequist Gate to Namutoni Camp are paved. Some drives (e.g. the Eland’s Drive) are in worse condition and sometimes have holes. In principle, however, all roads are feasible without a 4×4. The speed limit in the park is set at 60 km/h.
- Safety: If you are out and about in the park, you must always be in the car. Disembarking is only allowed at specially marked rest stops – there you will also find simple toilet facilities (usually outhouses).
- Refuel: There are petrol stations in all three larger camps. However, you should not rely too heavily on these refuelling options and refuel every time you drive past a petrol station. For example, when we wanted to refuel at Namutoni Camp, the diesel pump was broken (and the nearest gas station 100km away).
Safari in Bwabwata National Park
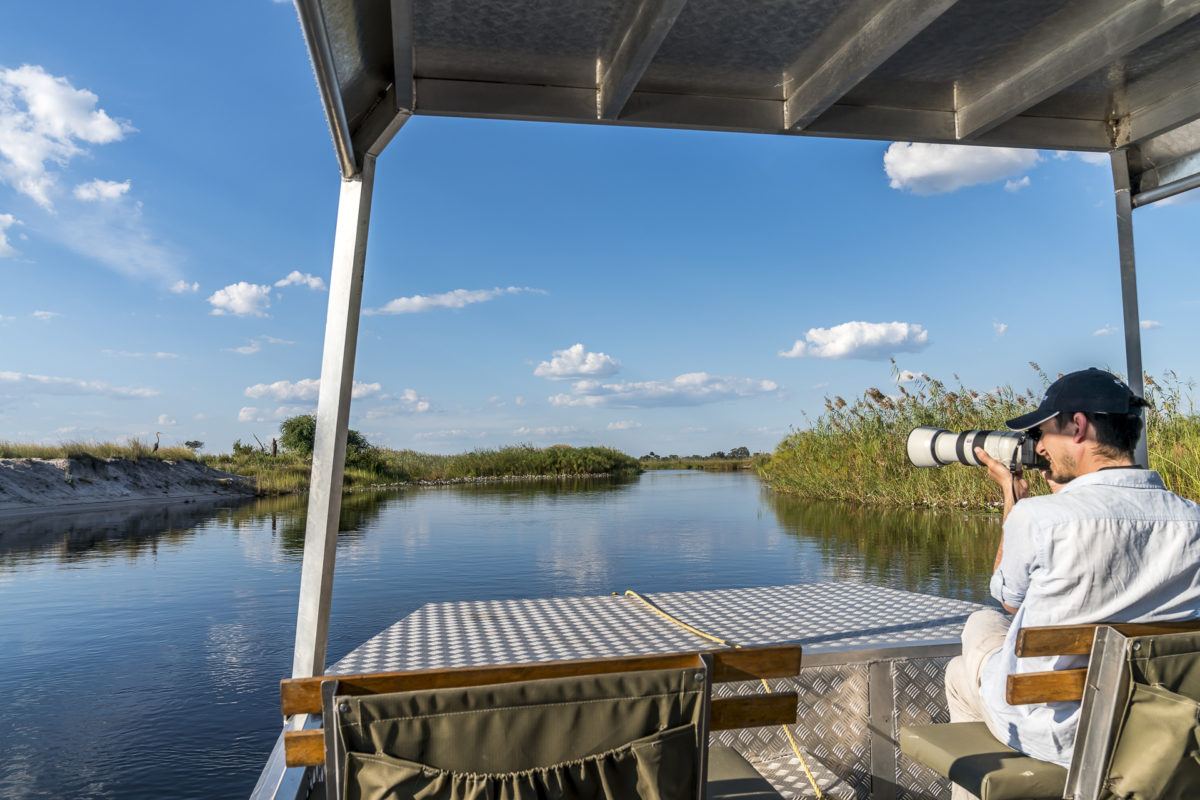
The Bwabwata National Park in the northwest of Namibia is much less known than the Etosha National Park. However, as with the Etosha National Park, this is a nature reserve and not a private game reserve. Unlike Etosha National Park, Bwabwata National Park is not fenced. The animals migrate freely between Angola, Namibia and Botswana. Due to these natural migratory movements, it is not “easy” to see as many animals at once as in the Etosha National Park. Therefore, it is worthwhile to take guided game drives with a local guide.

sony a9 100mm 1/3200 f5.6 iso 3200
sony a9 400mm 1/3200 f5.6 iso 1250
sony a9 400mm 1/2500 f5.6 iso 3200
sony a9 400mm 1/3200 f5.6 iso 2000
sony a9 400mm 1/2500 f5.6 iso 800
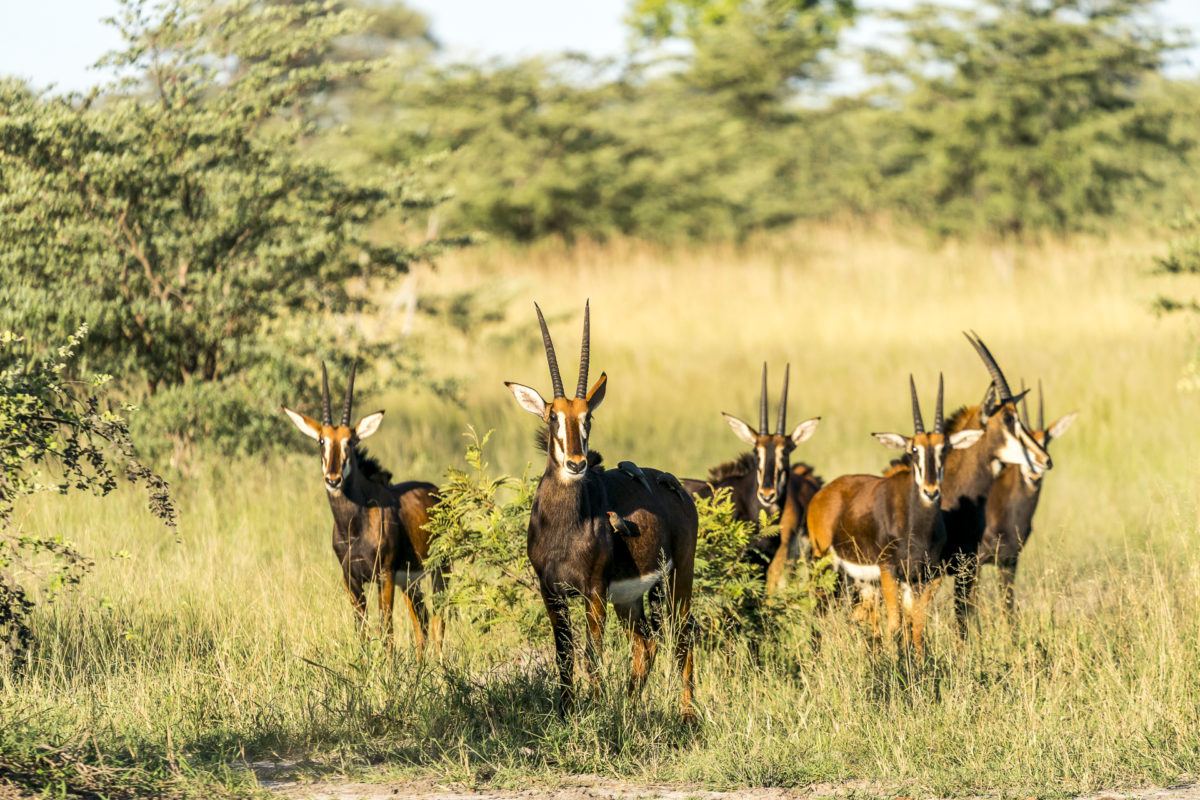
sony a9 373mm 1/2000 f5.6 iso 640
sony a9 400mm 1/1000 f6.3 iso 1000
sony a9 400mm 1/3200 f5.6 iso 1000
sony a9 306 mm 1/1000 f5.6 ISO 3200
Practical tips for Bwabwata National Park
- Best time to visit: Similar to the Etosha National Park, April to October is considered the best time to travel in northwestern Namibia. The vegetation and also the migratory movements of the elephants here are influenced by the water floods of the Okavango.
- Cost: The Bwabwata National Park stretches to the left and right of the B8 between Divundu and Kongola. It is much more fragmented than the Etosha National Park and there are no government accommodation options. If you explore the region as a self-driver, you should definitely use all-wheel drive (4×4), as the majority of the sand tracks here (off the B8) are more or less deep. Most privately run lodges also have pitches for campers. Unlike other Namibian national parks, there is no entrance fee to pay.
- Accommodations: The privately run lodges in the Bwabwata National Park almost all offer an exclusive safari experience, which can compete with the lodges in the neighbouring Chobe National Park (Botswana) in terms of standard. We stayed two nights at Nambwa Tented Lodge. The location right next to the Kwando River (tributary of the Zambezi) ensures that you can observe the flora and fauna both in the countryside and on the river. The costs here are around 320 CHF per person/night with half board in mid-season (April-June).
- Refuel: Refuelling facilities are available in the larger towns such as Divundu and Kongola. The B8, which connects the main towns, is a well-developed tarred road.
You can find more information and tips about our Namibia trip in this blog post: our 9 Namibia road trip highlights
Note: Sony has loaned us the FE 100-400mm F4.5-5.6 GM OSS telephoto zoom lens for testing purposes for the Namibia trip. All impressions and opinions are, as always, ours.
Leave a Reply